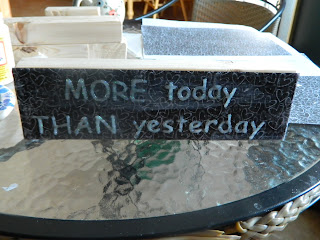
White and black fabric puff paints
2 sheets of scrapbook paper
Wax paper
Mod podge
Icing spatula
Foam Brush
1/2 of a 2x4 or similar wood
Place the wax paper over your printer paper and use the paints to trace the words. Make sure to make them good and thick so they with be easier to remove later. Let dry for several hours or overnight. Oh btw thankfully my husband quickly noticed I used the wrong year so I did have to redo the last numbers and make a 03 lol.
Use an icing spatula or something similar to carefully scrape the words up from the wax paper. Be patient while doing this. The puff paints letters are stretchy and flexible which makes the fairly easy to work with but still be cautious not to tear any but if you do it's easy to make more of course :)
Cut your scrapbook paper the size of each block that you are going to be using it on. Place a layer of mod podge on the block, then place the paper on top of that. make sure you rub that paper down good and press it on there leaving no air bubbles.
Put another layer of Mod Podge on the top of your scrapbook paper and now attach your puff paint letters. Mog podge dries clear so it will leave a smooth shiny finish when it's done. It also dries quickly so make sure you apply more thin layers if your letters don't seem to be sticking well. Press your letters down to secure them.
Now continue on with creating all your blocks in the same way.
I used glitter white puff paint because I already had it on hand but it dried a little clear so it wasn't looking as good as it would have if I had used regular white. The heart I used has special meaning because my husband (who is an aspiring tattoo artist) actually tattooed that same heart on my ankle. It was his first tattoo he did on someone other than himself using the tattoo gun I bought him for Christmas. Makes this even more special <3
To make it look better (and not have to redo over half of it) I decided to bust our some craft paint and just paint my glitter puff letters white. It was pretty easy to do but once again had I used regular white instead of getting fancy with the glitter it would have been great from the beginning lol.
A thousand times better and now it's officially complete. I do plan on making another block to put a picture on like the original but that will come after I print one out. What special symbol would you use in making a sign like this? Why is it special to you?


No comments:
Post a Comment