
Wednesday, December 12, 2012
Simple and Cheap Dinner Recipies: John Wayne Casserole
Since moving back to the states from Germany or finances have been WAY beyond tight. When it comes to grocery shopping in order to save money I have been buying a lot of box meals (like hamburger helper and Velveeta skillets) but after months of eating these I am absolutely sick of them and so is my family. I have ask readers and friends for their favorite budget friendly meals as well as scouring pinterest for some. In my last hunt I came across this John Wayne Casserole recipe so I bought what was needed and cooked it last night. Oh.M.Gee this is one of the best meals I have EVER made! I found the recipe here http://www.navywifecook.com/2012/07/john-wayne-casserole.html. I omitted the bell pepper and only put jalapeños on half so it wouldn't be to hot for the kids. I also just added the cooked half of the onions into the hamburger meat instead of having them as a separate layer. Most everything that goes into this is a staple that I have in my pantry at all times so the only thing I actually had to buy was 1 1/2 pds hamburger meat at $3.50 and some fresh roma tomatoes for about .50 and in order to make it another 2-3 times or so (which I will be doing) those are still the only 2 things I would need to buy. We all enjoyed seconds and our bellies were happy happy happy! Oh and my husband who hates eating leftovers just finished eating what we had left from last night lol.

Mini Apple Pies: A great snack for the kiddos and YOU
I made some mini apple pies for snack today, oh and a couple slices of cinnamon pizza for my daughter who doesn't like apples. These were delicious and super easy! Perfect snack for weekends or winter break when the kids will be home all day.
Ingredients:
1 apple sliced and cored
1 package of crescent rolls
1/3 cup cinnamon sugar mixture
2 Tbsp melted butter
Heat oven to 350. Unroll crescent rolls. Brush the unrolled crescent with melted butter. Sprinkle on cinnamon/sugar mixture. For cinnamon pizza slices just lay the unrolled pieces on cookie sheets but if you want apple pies then place an apple slice at the wide end and just roll it up. I used pink lady apples but use any kind you want. Place on a cookie sheet, brush melted butter on top, sprinkle with cinnamon/sugar and bake until golden brown. About 10 mins for the pizza slices and at least 15 for the apple pies. Let cool and enjoy!!

Friday, October 19, 2012
From Trashy to Classy: My Daughter's Dresser Makeover
Alright so in my last post Help me!!! Design my daughter's "new" dresser I asked for help from all of you on what to do with this terrible dresser I blindly bought. I received LOTS of comments with some awesome ideas. After three long days of mainly non stop work I am happy to say the hunk of junk is now BEAUTIFUL!!!!! I had so much trouble figuring out exactly what I wanted to do with this other than make the base black. A few of the comments suggested painting the side of the drawers for that extra pop of color and removing one of the drawers to make a cubby shelf. I loved both those ideas so knew I wanted to incorporate them into the new design. Originally I planned on keeping it black, white and pink but after starring at it for hours I got an epiphany!!! I have been DYING to find something that matched the blue in her rug for months but have come up empty handed on all my searches. THIS was the perfect thing add that color to the somewhere other than the floor. So how do you find that perfect matching color in a paint store? That's an easy one just pick up the rug out of the room load it in the back of your car, drive to Sherwin Williams and walk through the door with rug tucked under arm. LMAO I was sadly proud of this moment. They were very helpful as always and we picked the perfect color in minutes. I don't have pics of the "making the magic" process mainly because I didn't know what I was doing until it was already done. To sum it up though I sanded it down some to rough up the surface than used all my little buckets of paint (sample quarts from Sherwin Williams that costs $6 each) to paint each area separately. Each area has 3 coats of paint on it. I used a regular good angled paint brush on everything except the handles, used some small craft brushes on those. For the cubby I just removed the drawer track that was in there and cut a thin pine board to fit inside. Then I painted the board and nailed it into place.

 |
| The before pic.... |
 |
| and the AFTER!!!! |
 |
| I have been dying to use the blue from her rug somewhere! |
 |
| I painted the sides of the drawers for that extra pop of color |

 |
| This is the original hardware that came with I, I just painted it to match |
 |
Found these super cute knobs at Hobby Lobby |
 |
| Here it is in all it's decorated glory. |
 |
| I am extremely happy with how it came out and think it looks perfect in her room now. Total investment on this one: $60 for the dresser black paint leftover from her chair rail project so it was free pink paint left over from painting her walls so it was free teal paint $6 (with plenty of leftovers to make wall art with hehe) board for cubby shelf $5 at Lowe's Knobs came from her old dresser but got them 50% off at Hobby Lobby which made them $3 each Total Cost: Lots of back pain but it's now a priceless piece of art :) |
Wednesday, October 17, 2012
HELP ME! Design my Daughter's "New" Dresser
Hi there friends and loyal followers!! Today I am doing the first of many DIY projects I have planned were YOU will help me make the design and color choices!! That's right I am asking for some help in some of my furniture makeover projects and I want that help to come from you guys. Today's project is this.....


 As you can see her room is black, white and a couple shades of pink so this giant white and yellow thing is not working on there. Here are the two paint options I have come up with so far....
Option #1-Make all the areas currently white actually white again. Paint all the yellow areas the same light pink that is on her walls. On the top three drawers that have the swirly detail, paint the border around that detail area black (like a picture frame). Geez I hope this is making sense to you
Option #2-Paint the dresser base, hutch top trim, the yellow area around the mirror and outsides of the hutch black. Paint the hutch shelves and backboard behind the shelves and drawer fronts pink.
Option #3-I need an option 3 so if you have more ideas please throw them at me lol.
Voting starts now and will end at 1pm today since that is when I get the kids from school and pass a Sherwin Williams which is where the paint will be coming from.

I bought this dresser because when I moved my master bedroom around for the third time I accidently broke my dresser into a lot of pieces (oops). I kind of bought this blindly which is a mistake I will never make again. I knew the person selling it and saw a picture of it and in the pic it looked like it was in GREAT condition for $60 so I was sold. I sent my husband to pick it up and since he has been very impressed with some of the makeovers I have done so far he figured I knew what I was getting into and went ahead and brought it home no questions asked. Well when I saw it for the first time in my garage I discovered it is a hunk of junk. All the drawers need work, it smells like cigarettes and there is a TON of writing on the top of the actual dresser part. This is by far my worst investment yet BUT I am in $60 already so HAVE to make it work.
Originally like I said I bought this for myself since I broke mine but my daughter fell in love with it so now I took her dresser and I will be making this over for her room. Here's where I need your help, here's some pics of my daughters room if you don't remember it from previous posts.


Option #1-Make all the areas currently white actually white again. Paint all the yellow areas the same light pink that is on her walls. On the top three drawers that have the swirly detail, paint the border around that detail area black (like a picture frame). Geez I hope this is making sense to you
Option #2-Paint the dresser base, hutch top trim, the yellow area around the mirror and outsides of the hutch black. Paint the hutch shelves and backboard behind the shelves and drawer fronts pink.
Option #3-I need an option 3 so if you have more ideas please throw them at me lol.
Voting starts now and will end at 1pm today since that is when I get the kids from school and pass a Sherwin Williams which is where the paint will be coming from.
Tuesday, October 16, 2012
Operation Bathroom Makeover: Complete!!
You remember when I started my low budget bathroom makeover I turned my builder's grade cabinets into a beautiful dark wood for less than $20. If you missed it you can check it out here. Then I added in a new shower curtain from Kohls for another $20. Well now it's time to complete the low budget makeover mission! This is what the bathroom looked like when I started...


Here's what I have already done, refinished the cabinet's and added a new shower curtain.

Next step was to remove the mirror. This mirror had a silicone seal running along the bottom edge where it sat on the top of the back splash and then two brackets that were fitted over the top edge. We taped the mirror up just in case the glass started cracking or breaking while we remove it. Then ran a knife across the bottom edge to break through the silicone seal. While I held the mirror in place my husband pushed up the two top brackets. The mirror was then free to be lifted and taken away.
Next I used a sanding block to try and smooth out the edges of where the mirror was since paint had pooled some in those areas. I also scrapped then silicone off the where the old mirror had been fixed onto the back splash. Once this was done I was ready to paint.

The color I choose is actually a very popular color from one of my previous posts. I am using Moody Blue by Sherwin Williams. This was a paint sample I originally picked up for my living room but thanks to a mix up I got and even better color for in there and had this left over. Here's the story behind the color. The sample quarts Sherwin Williams sells are satin finish which is my fav and they large enough to cover a 75 sq ft area. This bathroom is pretty small so I am hoping my little $6 sample can will be enough but if not getting more is easy.

The painting is done, well almost I did run out of paint so gotta get another sample quart. The only thing I was not able to cover though was the top edge so my little sample can did almost make it through the whole bathroom which is awesome.
Next step was hanging this amazing mirror I got from a yard sale for $20. This mirror might just be my favorite investment EVER!!!! It is a framed mirror which had hanger brackets attach to the back of it so all we had to do was figure out how put some anchored screws into the walls in the perfect spot. I used a piece of cardboard and made a template of the back of the mirror. Then all I had to do was hold the template onto the wall, level it and tap in a nail where the hangers would land. This worked perfectly!!!! Now that the secret mirror was hung I had one more project to add to the bathroom, some shelves....

Isn't the detail and color GORGEOUS!!!!!
I found a cute wall shelf on the side of the road a couple of weeks ago and wasn't sure what to do with it until now. The previous home owners of our house were kind enough to leave any paint they had left over. One of these gallons (which is almost full) is Valspar's Antique Lace. This is a beautiful yellow cream color, it was used for the door frame around our garage so it is outdoor paint but hey that just means it's weather proof and it can with stand steam from the shower with no problem at all. So I used this free extra paint I had sitting around and painted the kinda ugly boring shelves with it. Now they are cute :) (I had pics of this whole process but apparently forgot to download them before wiping out my camera, sorry)
Soooooo now here it is!!!!! The bathroom is complete, for now at least lol.


 |
| The bathroom went from this..... |
|
| to THIS!!!!! |
Ok so here's a recap of what I did and how much I spent:
Stained the cabinets $15
Painted using 2 sample quarts of Sherwin Williams Moody Blue $12
New shower curtain from Kohls $20
Completely replaced the mirror to a BEAUTIFUL framed one $20 yard sale find
Bathroom cubby shelves FREE (found in a trash pile and painted with extra paint I had sitting around the house)
Grand Total is $67 for a COMPLETE makeover!!!!
If you missed how I did the cabinet makeover click here and check it out.
Sunday, October 14, 2012
Mug Cakes REALLY Work!!!!
I have been craving something sweet for at least a week now and we have NOTHING in my house at all. I have also been trying to save money and lose weight so buying sweets was scratched off the list too. I finally decided at 11pm the other night I couldn't take it anymore. I needed candy, cookies, cake, ANYTHING with sugar and I needed it NOW!!!! I have pinned a few of the mug cakes and mug cookies on pinterest with intentions on trying them but never actually thought they would work so I just blew it off. In the midst of my desperation for something sugary a mug cake was the only thing I had enough supplies on hand to make. I opted for a peanut butter one (only because I also had no chocolate chips). The recipe was very simple.
Peanut Butter
Mug Cake
recipe from//Kirbie's
Cravings
4 tablespoons all purpose flour
4 tablespoons white granulated sugar
1/4 tsp baking powder
1 egg
3 tablespoons peanut butter
3 tablespoons milk
3 tablespoons vegetable oil
Combine all ingredients in an over sized coffee mug. Whisk well with a
small whisk until smooth. Microwave on high for 1 1/2 minutes and then take it
out to check to see if it is done. If not, continue to microwave in thirty
second intervals. Mine was done at 2 minutes. You don’t want to overcook it or
it will become rubbery. You can also make this into two smaller-sized mugs. You
can mix the batter all in one mug and then pour half into another mug. Make sure
you cook each one individually.
Since this recipe says that it makes enough for 2 mug cakes and my husband was not going to joining me in the goodness I ended up just making it in a glass microwave safe cereal bowl. Not only did that make it easier to mix up but it also only required getting one bowl dirty instead of two mugs lol. I followed the directions to a T after that. I cooked it on high in the microwave for 1 1/2 mins and then an additional 30 secs. It was cooked to perfection! In an attempt to not completely blow my diet I came up with the idea of adding some banana to it. Peanut butter and bananas can never be bad for you right? I scooped out a little more than I should have since I was so very desperate for this lol. Put my serving onto a plate, covered it in banana slices and added a drizzle of chocolate syrup to it. After that I entered heaven, OMG this microwave cake blew my mind! It was so delicious, moist and light and fluffy just like a regular cake baked in the oven.

I most definitely will be making this and many other mug cakes in my future. Next time I make this one I am going to 1/2 the recipe and use an egg white instead of a whole egg to make it healthier and so it will be a single portion size and not double. Make this because you WILL enjoy it!!!!!!

Tuesday, October 9, 2012
Best Mistake EVER!!!!!!
When we bought our house the previous owners did a great job painting every room beautiful shades of neutral colors. As you all figured out from my red kitchen makeover I don't do neutral I do BOLD! Since the day our entire house arrived from it's 2 month long trip across the ocean I have been trying desperately to figure out what to do with our living room. It is of course the largest room in the house and thanks to our nice pretty open floor plan the living room flows right into the dining room/kitchen. I love the layout but when trying to find paint colors that can make a statement in the living room with a bright red dining room in the background it can be a little tricky. Another hard part was convincing myself that it was ok to paint even though all of our stuff worked quite well with the, we'll call the color dark beige, that was already on the walls. The last hurdle we had to figure out was the base boards, what we would do with those and what would look best with them. See another one of those little touches the owners had put on the house was they took out all the normal base boards and replaced them with 1x3 pine wood plain unsealed boards. They also did these boards around all the doors too. They are not one of my favorite features of the house and our plan was to rip them out as soon as we moved in but buying all the new molding is going to be very costly. We then planned on just staining them so we could darken them up and at least then they would be sealed but once again picking a color to do since it's through the entire house has been very difficult. Here's part of the living room before paint. All the furniture is dark cherry/brown, the couch is dark brown and the walls are a shade of brown.
 I put weeks of thought into what paint color I wanted to do for the living room, so much thought that I lost TONS of sleep at night because all I could think about was paint colors. Every house we have ever done any painting in I always painted at least one wall in the living room a sage mossy green color and the complimenting walls have been medium tan. My decor with this has been browns, blacks, coppery oranges and red, lots of red ;) Shoot even when my husband and I had our wedding ( a few years after we actually got married) these were the colors we had for everything.
Here's a pic from one of our apts in Germany, please excuse the decorations and food since it's a pic from my son's birthday.


Here's a pic from one of our apts in Germany, please excuse the decorations and food since it's a pic from my son's birthday.

That's the green I have used in three different houses so I wanted to change things up this time even though I still have most of the same decor then as I do now. Sooooo now getting on to the fun part of this post.....I had a vision! When I have these visions my husband gets a little scared because I don't stop until I get that vision made a reality. In the case of this vision everyone thought I was crazy and that the color I wanted would look terrible. I second guessed myself a lot thanks to all the opinions from everyone but decided the color I wanted to do was BLUE! I never in a million years thought about painting any room in my house blue but my gut said it was the way to go. I ran to Sherwin Williams and started buying up some samples.

At first I was having trouble with the idea of not using green so I got one green sample and one blue. I HATED them both though and knew I was just fine NOT having green walls in this house.

The blue I picked was to cornflower so I grab a ton of swatches trying to decide if I should go silvery blue or a form of more teal blue. After tons of starring and debating I headed back to Sherwin Williams for some better options. Here is where this story becomes the best mistake ever!!!!! I went to Sherwin Williams and they are FANTASTIC in there, I spent about 45 mins with a wonderful guy who helped me stare down and compare every shade of blue they had against a dark brown swatch (for the couch color) and the swatch of red I had from my kitchen. I finally choose two blues and one other accent color that I wanted to try and use on a side table that needs redoing. He starting mixing up my order for the three colors and when the first color was done mixing he realized that he had accidentally put the tinting amount for a gallon instead of a quart so the color was much darker and WAY different that the original color I had picked out. He went ahead and put that one aside and made me up another one with proper measurements this time. I paid for my 3 samples and then he carried them out to my car for me, he also had gone ahead and given me that messed up quart at no charge because they were just going to throw it away and said "hey you never know you may for the perfect use for it one day". I thanked him so much for being awesome and headed home.

I was trying to cover up that hideous green so when I painted on my new samples I used all three blues making sure to put that darker color mess up in the middle so the other two blues would pop. After about 15 mins of non stop staring the light bulb went off in my head and I ran back out the door. That color the guy had accidentally made was PERFECT!!!! I ran back into the store and asked him to accidentally make that again but in a gallon this time. He ended up just making a swatch from my sample and having the computer generate a formula for it. The color was actually supposed to be the first one in the row which is Moody Blue but since he made is gallon sized in a quart it ended up being Moody Blue x 500% which is a whole different color.

Here it is in all it's glory!!! I am soooo in love with this color and I think I looks gorgeous with the red in the back ground. This is by far the best mistake I have ever encountered.

My breakfast nook/Coffee bar area

The whole living rooms with my lazy pups. Oh and remember that fourth sample I got with intentions on using on a end table redo....well it made it's way onto the wall too. I didn't think hubby would dig it but he loves it too :)

I still get up every morning amazed by this color! I think the house is coming along beautifully and it is definitely OURS now and no longer THEIRS which makes me proud and super happy.
Thanks to the paint sale at Sherwin Williams this dramatic change only cost $65 and that includes lots of sample quarts of paint along with the gallon I bought to complete the project.
I am in no way endorsed by Sherwin Williams, they are just plain awesome.
Wednesday, October 3, 2012
Big Shopping on a Little Army Paycheck
After arriving from Germany to Texas we have been fighting the endless battle of how to live on much smaller checks with much bigger bills. I watch the extreme couponing shows and it makes me sick how much these people hoard items that will go bad long before they ever even get used, I hope they watch their expiration dates carefully and at least donate some but I doubt it. Not only do they buy stuff they will never use but they don't have much in the way of meals except things like spaghetti. My family and I like meat whether is red, white or ground up we have meat in some way every night. Where I am in Texas there are no stores that even offer doubling and tripling coupons which is how much extremers get so much bang for their buck so going extreme isn't even a possibility. So I just go to the store smart, not extreme. Here are some tips I have come up with to stretch every dollar I possibly can and still be able to feed all 4 of us plus two dogs 3 times a day on $150 every two weeks.
Tip #1- The best store in central Texas to shop at and get more bang for your buck is HEB. They are amazing between their sales, coupons and free item offers. NEVER shop at HEB on a Wednesday because that is their sales transition day so they have very few coupons out an their sales flyer runs Thursday to Tuesday so there are little to no sales on Wednesdays.
Tip #2- Take inventory of what's in your pantry, fridge and freezer before you make your shopping list. Most people go to the store and just buy groceries with no rhyme or reason and by the time you get home you can't even remember what all meals you planned on making or if you even got what you need to make said meals. I bet if you take a long hard look to can find at least two meals that you didn't even know you had in there just because you forgot you bought it.
Tip #3- Make a VERY detailed grocery/meals list. We go anywhere from 14-17 days between paychecks but my budget for groceries stays the same. When we are on one of the extra long payday stretches that inventory you made in tip #2 is going to come in very handy. Here's how I make my shopping list: I take a piece of paper, on the front side I write down all the meals I know I can make with what I have leftover in the fridge, freezer and pantry. Next step is thinking up cheap but still good meals we feel like making for the two weeks, make sure you plan a meal for EVERYDAY (this comes in later as being extra important). Tacos and pizza are usually always two of the meals I have planned because we love them and have yet to get sick of having them once every two weeks. Once you have you list of meals flip your paper over and write down every ingredient you need for each meal. This is going to be your actual shopping list so make it pretty lol. Once your have written down everything you need go to your pantry, fridge and freezer and cross off all those little things that you already have like cans of cream of chicken soup, seasonings, maybe you already have a can of corn. If you notice there is a particular meal that needs a lot of stuff and you have none of it come up with a back up meal for that day so once you get to the store and see how much everything needed for that meal will cost you can stick with your cheaper back up one. Also if you have a meal that calls for say...a box of bisquick or something try and get to meals out of things like that since they aren't always cheap. Maybe you can make biscuits to go with dinner and pancakes for breakfast and still have more left that you can use for meals the following payday too.
Tip #4- Now that you have a list of meals you will actually like to eat you can start hunting for ways to save money on them. I pay a $10 fee per month to use http://www.thegrocerygame.com/ for my HEB shopping. This website lists all the sales going at my local HEB, it lists all the coupons they have available in store and tells you what percentage you will actually save when you take advantage of these deals. HEB is great with doing "meal deals" every week where you can buy one or two items and get all kinds of free stuff with it. For example when I went to the store yesterday the meal deal for this week's ad was when you bought one of the huge Stoffer's Lasagnas you got garlic bread, salad and a few other items free with it. This means that for only the cost of your main "ingredient" you can get everything you need for the entire meal. These deals can be amazing but here's where paying attention to the Grocery Game comes into play, I saw that deal and the lasagna they offered was enough to feed my entire family for two days but the lasagna was $11 and the free items offered with it didn't have much value to them since the garlic bread was only worth 99 cents and so on. The grocery game showed me my percent of savings on this particular meal deal was only about 30% and since we don't really like lasagna it wasn't worth spending $11 of my budget on this particular deal. Most weeks the meal deal is definitely worth it because it is something we would enjoy eating and the savings is great but not this week and that's ok since a new meal deal will be out in just a few days that we might benefit from better. When you are looking at the deals and coupons on the Grocery Game they highlight the deals with the best savings percentages for you can you can focus on those to get ideas for breakfasts and lunches (trust me I know that I hadn't included those yet :) You can also adjust your grocery lists to add in a meal deal and maybe take out one of your meals that you don't see any savings on. Once you click on a deal it tells you how many you have to buy to get the deal, what your final total will be for each offer and where the coupon is that you will need for it i.e in store or online on coupons.com, red plum. After you click on every deal you might be interested in click the gather coupons tab. This tab shows you if there are any manufactures coupons that can be used with anything you picked out from the sales list. You can find a link to the coupon sites where these can be printed on the website as well. Now print your list of the deals you picked out. Your list will show the breakdown of what each deal offers and what kind of coupon you need for it.
Here's an example of how to combine meal deals with manufactures coupons:
This week for each box of Nature's Valley Granola Bars that I purchased there was a in store coupon to get a free HEB 2L soda with purchase. I also found a manufactures coupon for 50 cents off of 2 boxes of these same granola bars. Sooooo when I bought 2 boxes of granola bars (which my husband loves) I also got 2 FREE 2L sodas and saved 50 cents! How's that for savings!
Tip #5- Coupons!!!!! It's time to hunt down those coupons you saw on the Grocery Game that were NOT in store ones. HEB posts all their in store coupons directly in front of each item that the coupon can be used on so you never have to worry about hunting for those just grab them while you shop. http://www.coupons.com/ and http://www.couponmom.com/ are sites that you can use to pick and print coupons for free. Each coupon can only be printed twice and making copies of coupons is illegal so print your two and only use those. Now if you find ads you can clip and use as many as you want, we don't have very good coupon sections in our papers here so I just stick with using the online sites. Only print coupons you know you'll use and watch the expiration dates because there is no sense wasting ink and paper if they expire in two weeks and you can't fit these items into your list. If you have 2 cans of condensed soup on your grocery list make sure you print the coupon for how ever many cents you can get off when you buy three. <<<<<That right there is how you build a usable stock pile. See come next payday when you need condensed soup for a meal that can be one of the things you cross off the grocery list next payday. Or if you need 4 cans next payday you still have that extra can of soup AND that extra coupon for savings off three cans so your still coming out ahead. Never be afraid to do google searches for coupons because sometimes name brands only post them to their websites or print in ads and do not allow online places like coupons.com to access them.
Here's another example of something: I saw on Grocery Game that my Tyson frozen chicken was supposed to have a coupon from the Red Plum on Sept. 23rd but since I don't clip coupons from the paper I didn't have it. Coupons.com didn't have one either so I just googled it and found the coupon on their website so printed it from there. Easy peasy!
Now take a break and breathe because as complicated as this sounds it's really not that hard and it's totally worth the work when you can save anywhere from $25-$60 at least on your grocery bill every payday.
Tip #6- You are never to good to use store brands. A lot of people shy away from store brands thinking they are not as good as the name brand products and when buying at Wal Mart I agree with you but that is not the case at HEB. There are two store brands HEB carries, Hill Country Fare and the actual HEB brand stuff. I have never had any problems with Hill Country brand items not being just as good as the original name brand stuff they are knocked off of. The HEB brand is still good for canned items and such but I do not like it as much for things like cereal. Since these are in house items they don't go on sale as often as name brands do BUT they offer more coupons on these things.
Tip #7- Buy a bag of chicken every payday. We eat a lot of chicken so this is a no brainer for me but having frozen chicken around can save your budget all the time. For a family of 4 you can turn almost any boxed side dish into a full meal with only using 3-4 chicken breast. Most of the time there are a few breast in the bag that are thicker and would take forever to bake or grill so these ones are the perfect ones to chop up and through in a box of shells and cheese along with a can of rotel (hint hint recipe for some cheap mexi mac). A $10 bag of frozen boneless skinless chicken breasts can give you about 3 meals.
Tip #8- YOUR READY TO HEAD TO THE STORE!!!!! Grab your Grocery Game sales list, your stack of coupons, a pen and clear your head so your ready to focus. While you are in the store the meals you can make up as you go along finding savings are breakfasts and lunches. My kids take their lunches to school everyday and breakfasts need to be quick but filling so I always get stuff for sandwiches, waffles, pancakes and our snack box we keep. When you first walk into the store you walk into the fresh fruit/veggie area I grab whatever is on sale for that week that my kids will actually eat. When fruit and veggies are on sale it is either because it's their peak season and they are the freshest possible for the year or because they are going out of season so the store wants to sell them off. Obviously fresh is best so you always want to buy in peak season but my kids are picky so I bought cantaloupe this week because it was the only on sale fruit they will eat lol.
Once you have your fruit and veggies go down every aisle of the store grabbing EXACTLY what's on your list and scouring for those yellow in store coupons for any other helpful deals that you can make magic out of. You might find some amazing stuff that wasn't listed on the Grocery Game and you can either nix one of your preplanned meals to get it or add it in and trim something elsewhere. See when you go shopping with a precise list you get exactly what you need to make actual full meals for dinner which is typically the most expensive and biggest meal you spend money on. When you find little deals here and there you are either stockpiling which gives you extra savings next payday or you can use those extra meal deals as lunch or breakfast deals.
Tip #9- Did you survive the savings process???? Well if you did then there is a big fat smile on your face right now because you saved your family a buttload of money, made your shopping trip faster and then handed the cashier a gaint stack of coupons to make your total a true success. Do you remember how I said planning a meal for EVERY night was important....well that's because you know darn good and well after exhausting days like today you are going to eat out at least once this payday and since you bought a meal for everyday this paycheck you now have one meal already ready to go for the next pay period. So post up your meals list on the fridge, go out and enjoy being the proud shopper you are. OH it wasn't it nice of the baggers at HEB not only bagging your groceries but also offering to take them to your car for free!!! They get paid hourly so no tips allowed just pure nice service.
I am in no way shape or form endorsed by HEB or The Grocery Game, but I wish I could be lol :)
Monday, October 1, 2012
Trash Can Chandelier
Trash Can Chandelier.....did you ever think you would see those words all put together describing something actually pretty lol. A couple of months ago my daughter went to her Grandma's house for a week, when she returned our household goods had arrived from Germany and I (the most awesome mom ever that I am) had transformed her entire room into a black, white and pink Parisian themed oasis. She had no clue any of this was going on until she arrived and opened her door. I painted the walls, added chair rail, bought her a new dresser (and refinished it) and built her a shelf with storage bins. It was a MASSIVE project that I just finished in the nick of time for her homecoming. This is the transformation and big reveal pics of her room (minus the bed skirt which I had forgotten to put on but you get the point).


 |
| Before |
 |
| Before |
 |
| and AFTER |
 |
| I built that ;) |
 |
| Add caption |
 |
| uh hmm dresser needs another coat of paint |

The room was a HUGE hit with my daughter, family and friends but one word came up a lot (actually it's two words but one name) HOBBY LOBBY! Yes despite that fact that I had built the storage bin shelving, refinished the dresser (which was hideous before), refinished that end table and painted the entire room all you could see on the walls was that I went on a major shopping spree to H. L. for decor. Now I love me some Hobby Lobby but in this case I loved it a little to much so I returned half of the stuff.
Oh and I know what your thinking right now "Where the heck does the trash can chandelier come into the post!" The answer is right here, right now!
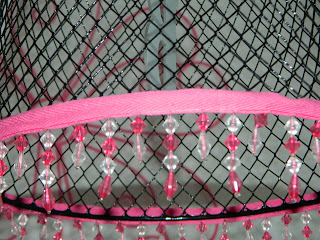
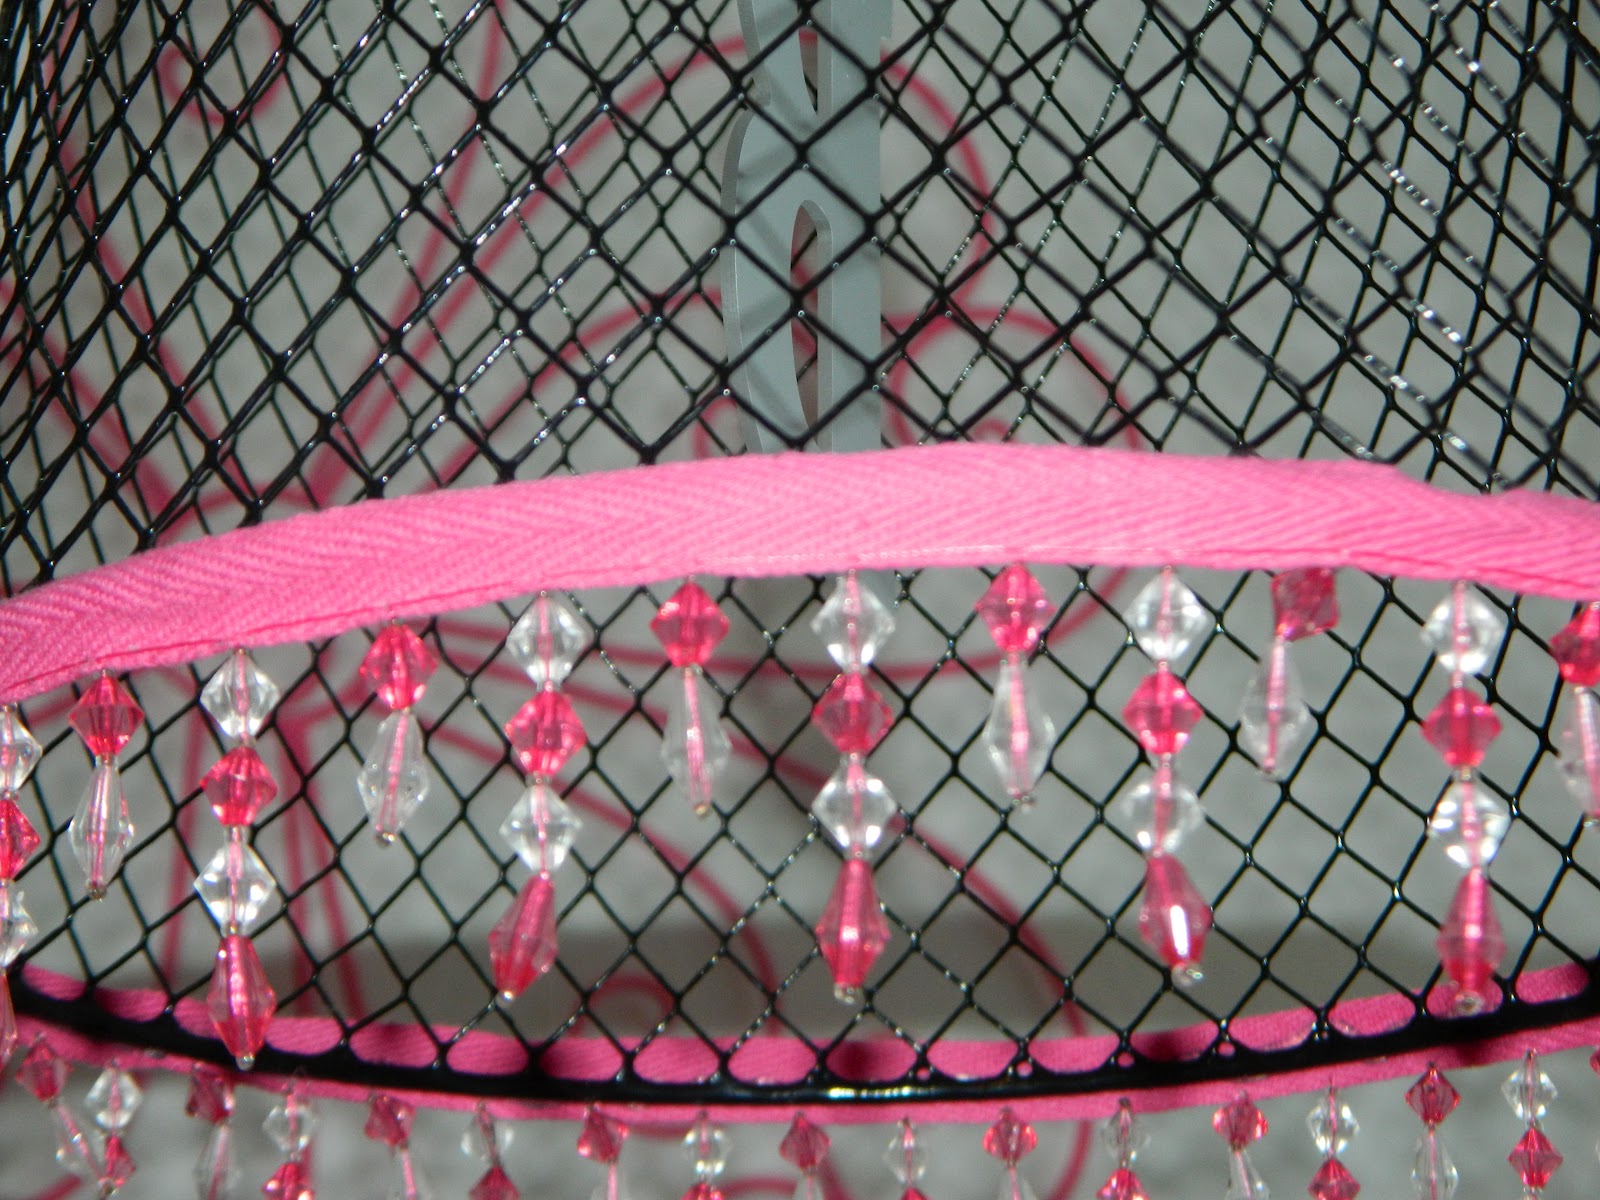
I found this wire trash can at the Dollar Tree and decided with some sprucing up it could be perfect in my daughters room as long as it's hanging from the ceiling not sitting on the floor.

I headed to where else but H.L. for the accessories I needed to make it pretty. (Anyone know where they hold Hobby Lobby addiction meetings) I found these pretty little things by they cross stitching supplies. You can buy them by the yard like you do fabric, in fact you take them to the fabric counter so they measure and cut it for you. I bought 1 yd. at $4.99 a yard which was the regular price so I then used a 40% coupon on it (go me, go me, go me)

I already had a small mirror in the shape of a B which is the first letter of my daughter's name so I knew I wanted to try and use that in some way. I decided to hang it from the center inside the trash can which meant I needed something to dangle it in there with. In comes the shiny jewelry making bead department. I hunted for AWHILE because most of the beads were very expensive and none were very 8 year old style friendly. Finally I found the perfect ones and they were only $1.99.
 |
| The one on the right. IT'S PERFECT! |
 |
| and so is the price on it! |
So now that I have the supplies I hot glued my beaded ribbon around the edge of the trash can. Then I tied my string of beads to the mirrored "B". I removed some of the beads from the string so that when I tied in the center of the inside of the trash can the "B" wouldn't hang to low in there. I got a cheap chain, mine actually came off of one of those coconut planters from Wal Mart which was on clearance for $1.50. Lastly I hung it from a small hook in the ceiling.
 |
| And there you have it a trash can turned chandelier! |

This posting nor any part of my blog is endorsed by Hobby Lobby, but it should be ;)
Subscribe to:
Posts (Atom)